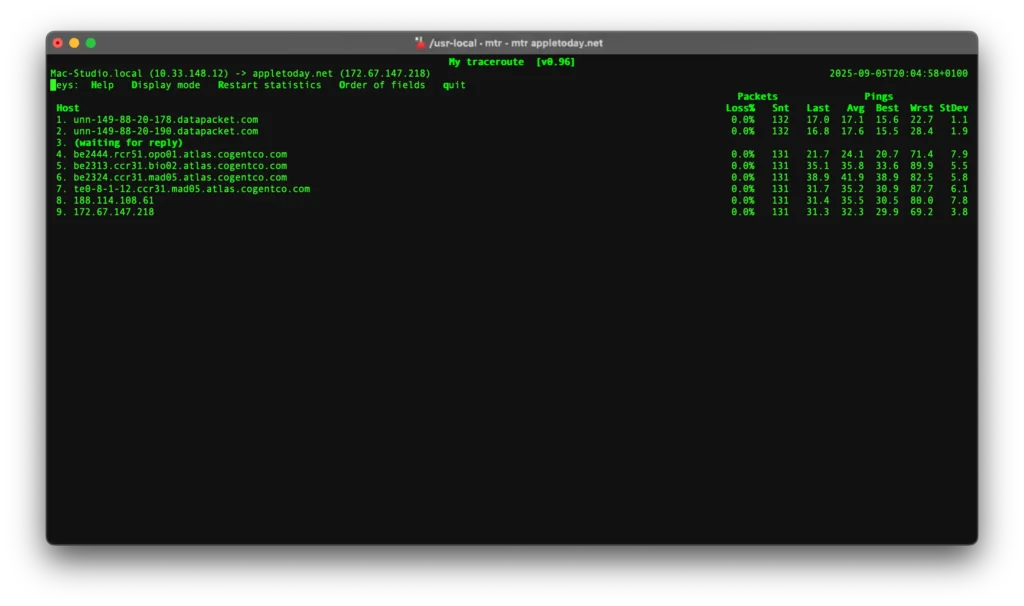

Tools like ping and traceroute don’t always find network problems. Undoubtedly they only tell part of the story. For this reason, MTR is a powerful tool that combines both. Its creator, Matt Kimball, first named it Matt’s Traceroute, but today, most people know it as My Traceroute. This tool gives you a live, updated view of the connection path from your Mac to another server. In short, this makes having a good version of mtr on Apple Silicon a key tool for any developer or admin.
You can install MTR with a tool like Homebrew, however, using package managers can add clutter to your system, as it often installs many extra files you may not need or want. With this in mind, building MTR from its source code is a much cleaner way to get it, and this guide will show you exactly how to do that. Get ready to get a lean install with no extra baggage.
How to Install mtr on Apple Silicon
With the preliminaries out of the way, it’s time to get hands-on. The following steps will walk you through the entire process of compiling and installing MTR on your Mac. It’s a straightforward process if you follow each step carefully.
Step 1: Preparing Your System
Before you can compile MTR, you must first set up a proper build environment. This process involves two phases: installing Apple’s own command-line tools and then compiling the essential open-source utilities needed to prepare the MTR source code.
Xcode Command Line Tools
Your Mac needs Apple’s core developer software to compile code. These are available as the Xcode Command Line Tools.
First, open the Terminal app and run the following command to begin the installation:
xcode-select --installIf the tools aren’t installed, however, a pop-up window will appear. Click “Install” and wait for the download to complete. After it’s done, you must accept the license agreement with the following command, which will require your password:
sudo xcodebuild -license acceptGNU Build Utilities
MTR uses the standard GNU Autotools system to prepare its source code for compilation. Because of this, you will need to compile these tools first.
1. Create a Working Directory
First, we will create a standard directory for our source code. This keeps your home folder clean and for this reason is a common practice. We’ll use /usr/local/src. These commands will create the directory and additionally give your user account ownership of it.
sudo mkdir -p /usr/local/src
sudo chown -R $(whoami) /usr/local/src
cd /usr/local/src
2. Compile the Tools
Now, from inside the /usr/local/src directory, you can compile each utility. In this case the process is the same for each: download, unpack, configure, compile, and install.
libtool
In case you want to know more about the GNU’s Portable Library Tool visit the official project page at the GNU website. The latest version available at this time is 2.5.4.
curl -LO https://ftp.gnu.org/gnu/libtool/libtool-2.5.4.tar.gz
tar -xzf libtool-2.5.4.tar.gz
cd libtool-2.5.4
./configure
make
sudo make install
cd ..
m4
The m4 utility is a prerequisite for autoconf and you can see the download location and mirrors on its official project page.
curl -LO https://ftp.gnu.org/gnu/m4/m4-1.4.20.tar.gz
tar -xzf m4-1.4.20.tar.gz
cd m4-1.4.20
./configure
make
sudo make install
cd ..
autoconf
Following up, you can compile autoconf. Currently the latest version is 2.72, and you can visit the official project page.
curl -LO https://ftp.gnu.org/gnu/autoconf/autoconf-2.72.tar.gz
tar -xzf autoconf-2.72.tar.gz
cd autoconf-2.72
./configure
make
sudo make install
cd ..
automake
Finally, compile automake. Currently the latest version is 1.18, but alternatively you may check the project page for a more recent version.
curl -LO https://ftp.gnu.org/gnu/automake/automake-1.18.tar.gz
tar -xzf automake-1.18.tar.gz
cd automake-1.18
./configure
make
sudo make install
cd ..
With the compilers and the build toolchain now installed from source, your system is fully prepared.
Step 2: Downloading the MTR Source
Now that your build environment is ready, the next step is to download the MTR source code. At this time you should still be working inside the /usr/local/src directory from the previous step.
The official project page is maintained at www.bitwizard.nl/mtr. As of September 2025, the latest stable version is 0.96.
The commands below will first download the source code from the official distributor, unpack the archive, and then move your terminal session into the new directory.
curl -LO https://www.bitwizard.nl/mtr/files/mtr-0.96.tar.gz
tar -xzf mtr-0.96.tar.gz
cd mtr-0.96
As a result your terminal prompt should now show that you are inside the mtr-0.96 folder, which means you are ready to compile the program.
Step 3: Compiling and Installing the Tool
You are now inside the mtr-0.96 source code directory. From here, you’ll run three commands in sequence to configure the source code, compile the program, and finally install it onto your system.

1. Configure the Source Code
First, run the configure script. This essential step not only inspects your system’s configuration but also prepares the source code to be compiled correctly on your Mac.
./configure2. Compile the Program
Once the configuration is complete, you can then compile the program using the make command. You’ll see a lot of text scroll by in your terminal as your Mac builds the MTR application. This is normal and may take a minute or two.
make3. Install MTR
Finally, install the compiled program. The following command copies the MTR binary and its manual pages to the correct system directories. It requires administrator privileges, so you’ll need to use sudo and enter your password when prompted.
sudo make installMTR is now successfully installed on your Mac. There is just one final step, however, to ensure you can run it easily from the command line.
Step 4: Configuring Your Shell Path
The mtr command is installed, but your terminal might not know where to find it. By default, the program is placed in /usr/local/sbin, a directory that in general isn’t included in your system’s default search PATH.
This final step adds that directory to your shell’s configuration, so you can run mtr from any folder.
1. Edit Your Zsh Configuration
Modern macOS uses the Zsh shell by default. Its configuration is controlled by a file in your home directory named .zshrc. The following command will safely append the line needed to add the correct path to this file.
echo 'export PATH="/usr/local/sbin:$PATH"' >> ~/.zshrc2. Apply the Changes
Before using the mtr command, for the changes to take effect in your current terminal session, you must also reload the configuration file. In this case, use the source command:
source ~/.zshrcSubsequently, any new terminal windows you open from now on will automatically include the correct path.
3. Verify the Installation
In short, the installation and configuration are now complete. To verify that everything works, run the mtr command with the --version flag:
mtr --versionIf your terminal prints the version number (e.g., mtr 0.96), you have successfully compiled and installed MTR on your Mac.
Final Thoughts on Using mtr on Apple Silicon
You have successfully followed through our guide and as a result, compiled a powerful utility directly from its source code. Above all, this process gives you a clean, custom installation of mtr on Apple Silicon, without any extra files or dependencies from a package manager.
Now that MTR is installed, you can use it immediately. For a quick test, open your Terminal and try running it against a public server:
mtr google.comYou’ll notice that, in fact, you don’t need sudo. This is because the installation correctly set the necessary permissions, allowing the tool to securely access network functions. Learning to compile software gives you more control over your Mac, and you now have a professional-grade diagnostic tool ready whenever you need it.